Video on demand (VOD)
Getting Started with MK.IO
Getting started with video on demand (VOD) with MK.IO
Hi, in this tutorial, I’ll guide you through how to create your first on-demand workflow in MK.IO. If you’re completely new, don’t worry I’ll start with the basics. And if you’re ready to dive deeper, feel free to skip ahead.
What is on-demand video?
On-demand video means making content available in the cloud so users can watch or listen to it whenever they want. In the video world, this typically means watching a movie, streaming a trailer, listening to a podcast... and many other possibilities.
The key difference from live video, which I cover in a separate tutorial, is that the content is already created and uploaded, ready to go.
Prerequisites
Before continuing, make sure:
- You have access to your MK.IO account: Account setup guide
- Your cloud storage is connected: Storage setup guide
Step 1: What’s an asset?
If you’ve worked with other video platforms before, I’m going to ask you to temporarily forget what you know about the term “asset” or “content” and learn what an asset means in MK.IO — it’s important. In MK.IO, an asset is a container of files that represents a piece of content. That content could be a video clip, a podcast, a presentation video… and much more.
An Asset in MK.IO is not just a file — it’s a container that organizes everything related to a piece of content. This may include:
- A name and description
- Files (video, audio, subtitle, manifest, etc.)
- Associated locators or filters
You can have as many assets as you want in MK.IO. But remember, an asset is not a single file, it’s a container. Inside that container, you can upload different kinds of files. Most of the time, you’ll upload audiovisual files to be transformed, but you can also add other files that complement your videos, such as images, documents, or metadata. Any files you store in an asset, even if they’re not multimedia content, can later be made available for download. This means you can use the feature to enrich your audiovisual materials with additional information or resources.
Step 2: Creating an asset
-
Go to Assets:
https://app.mk.io/project/<your-project-name>/assets(Replace<your-project-name>with the name of your MK.IO project) -
Click + Create Asset
-
Choose how to create it:
- From your cloud storage
- From your computer local files (MK.IO will copy them to your storage)
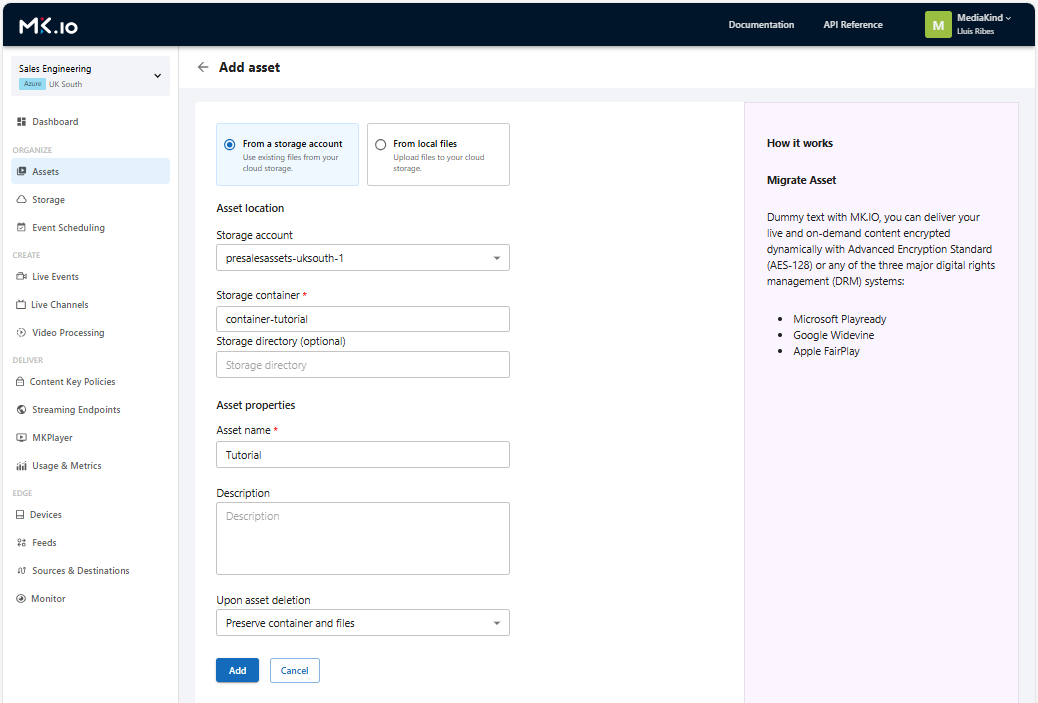
- In both cases, you need to keep these two options in mind.:
- Storage Account: presalessets-uksouth-1 . This is the storage where you are is created. In my case I use my storage in UK region.
- Storage container : container-tutorial . The name under which it will be stored in your storage
- Asset name Tutorial . The name you want to give your asset
- Storage directory (optional). This option allows you to create the asset structure inside a folder within the container.
- Description (optional) . Any additional information you want to include
The "Upon asset deletion" option lets you decide what happens when you delete the asset in the future, whether only the asset in MK.IO will be removed while the files remain in storage, or if deleting the asset will also permanently remove the files from storage.
Click Add. Done — your asset is ready!
Adding an asset
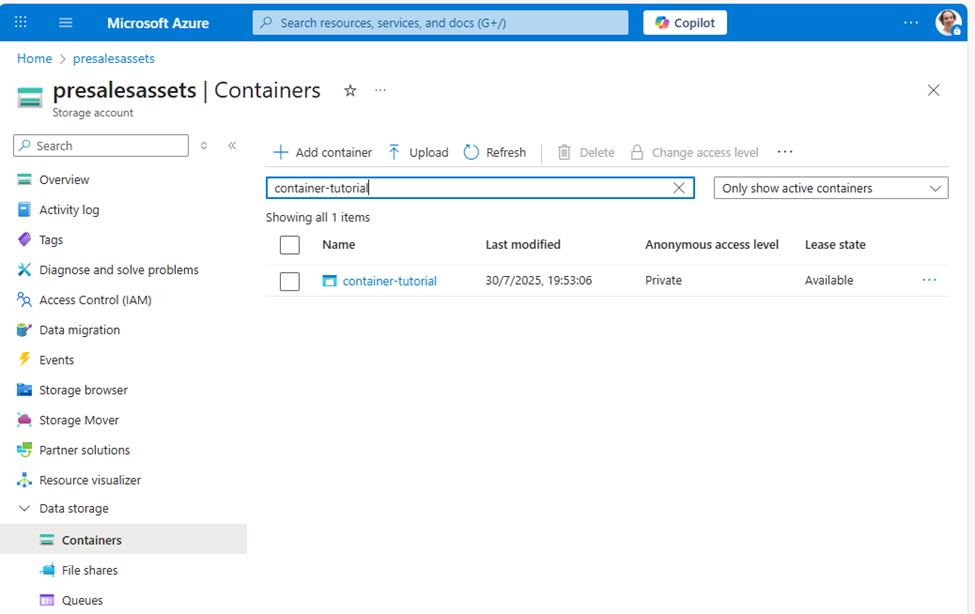
Tip: You can check your cloud portal to see the container. It starts empty and will fill up as you add content.
Step 3: Uploading a Video File
Now that you asset is created, it’s time to add content you want to stream to your audience. Go to the newly created asset (you can access Assets from the menu on the left) and open the Files on storage section. Click + Add files to upload your video, for example, a video contained in a .mp4 file.
In my case, I’ll upload a trailer for an animated film called Sintel (if you are curious you can find more information about the film here: https://durian.blender.org/download/ ). The file is on my computer, named sintel-2048-surround.mp4, it’s 300 MB in size and 15 minutes long, in a widescreen format.
Once uploaded, you’ll see it listed in the Files on storage section.
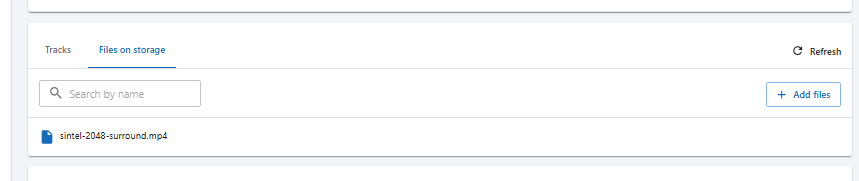
File uploaded into your asset
Let’s get it ready for streaming.
Step 4: What’s a Transformation?
A Transformation is a recipe — a set of rules — to convert media for different uses.
Some common examples:
- Prepare content for web streaming
- Extract audio (for podcasts)
- Create thumbnails
- Generate transcriptions
Let’s create a transformation to stream the video we uploaded earlier. For this, we’ll use an adaptive bitrate streaming profile, which is already available in MK.IO and ready to go.
💡 Did you know… Adaptive bitrate (ABR) creates several versions of your video at different qualities so the player can switch to the best one in real time, based on the viewer’s network, device, and environment. That’s why your video can stay smooth even when the connection isn’t.
-
Go to Video Processing → Transforms:
https://app.mk.io/project/<your-project-name>/videoProcessing/transforms -
Click + Create Transform
-
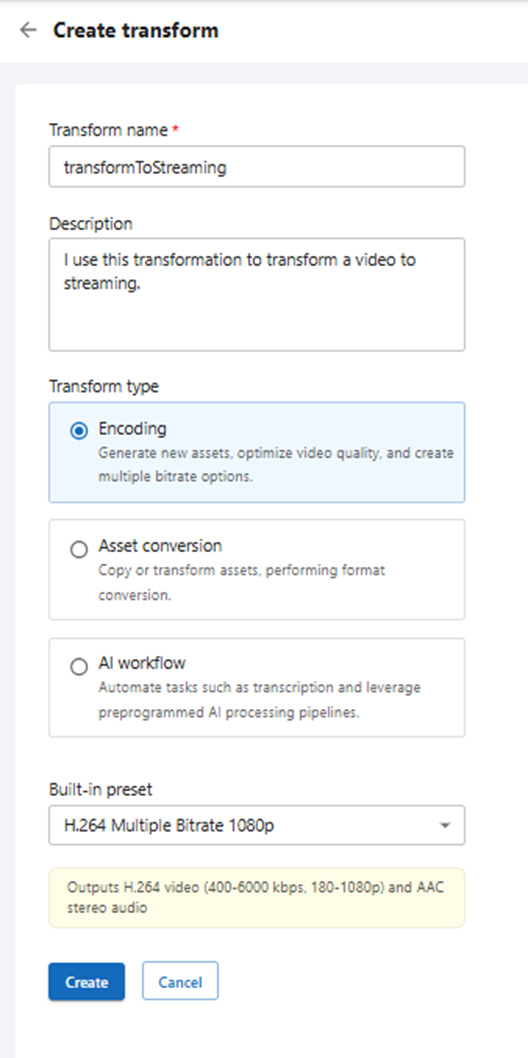
Fill in:
-
Name: TransformToStreaming. The name you want to add
-
Type: Encoding Here we have three options. For this tutorial, since we want to prepare the content for streaming to the audience, we’ll choose Encoding. Asset conversion lets you convert the content into a new format, and AI workflow applies artificial intelligence workflows.
-
Built-in preset: H.264 Multiple Bitrate 1080p When choosing Encoding, you also need to select the encoding type. For this tutorial, H.264 Multiple Bitrate 1080p is a good balance between performance and quality.
-
Transform selection
Click Create.
Step 5: Launching the Transformation Job
Now that we have our transformation created, we can use it as many times as we want to convert videos for streaming. That’s exactly what I’ll do with my trailer: I’ll create a job using the transformToStreaming transformation created before on the video file I uploaded to the Tutorial asset.
-
Go to Video Processing → Jobs:
https://app.mk.io/project/<your-project-name>/videoProcessing/jobs -
Click + Create Job
-
Select the
transformToStreamingtransform -
Configure:
- Input: Choose your uploaded file from the asset (e.g., container-tutorial)
- Output: Store the result in a new asset (e.g., tutorial-streaming)
Click Create
Heads-up: Starting a transformation job triggers resource usage in MK.IO and may incur costs. See mk.io/pricing for details.
Your transformation job has started. You’ll see it in the job list — you can search for it by the name you assigned, and you’ll have a link to the asset as well as information about its status.

- Scheduler: your job is in the queue, waiting for resources to be available for execution.
- Processing: your job is currently being processed.
- Finished: the job has been completed, and the transformation is ready.
- Error: your job encountered an error. What to do? Check out this tip:
Tip: If you’ve received an error during the transformation, you can check a file called highlevel.log, which will be created in the output asset container. This text file will give you clues that you can share with MK.IO support to help identify what went wrong
My job finished successfully, and if I go to the tutorial-streaming asset, I can see in the tracks a whole set of new video files — these are the ones needed for my content to be streamed over the internet, including videos for each resolution and an audio track.
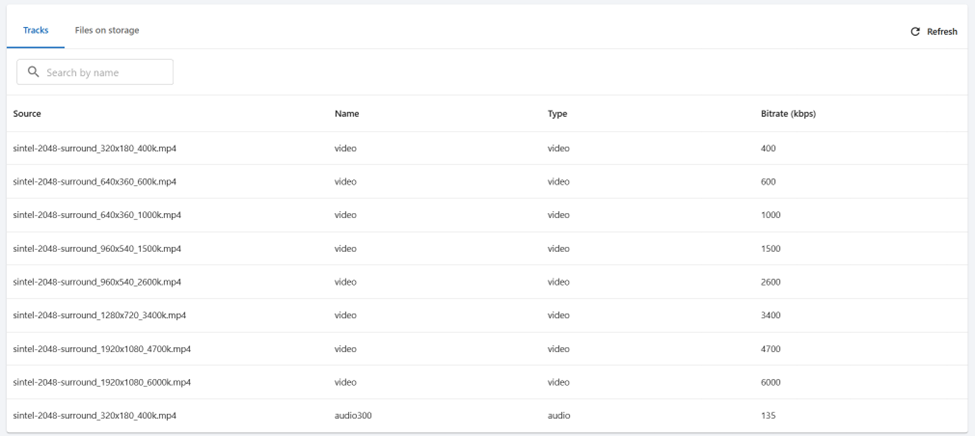
Tracks of you asset
Tip: If you go to Files on Storage, you’ll be able to see all the files created in your storage. There are many more than just the .mp4 video tracks, such as .ism, .mpd, .mpi, and .log files. Don’t modify them, as MK.IO needs them to function, but I encourage you to explore what each one does.
We’ve now completed a transformation, in this case to stream a video (remember, there are other types of transformations available). So, can we start streaming now? Well, not quite yet. The video is prepared, but we still need to:
- Create and activate a publishing point in your account
- Associate that publishing point with your asset
- Associate at least one Locator with your asset
These three steps are exactly what we’ll cover next.
Step 6: Creating a Streaming Endpoint
The Streaming Endpoint is the component in your MK.IO account that makes your transformed assets available to your audience on the internet. You can find a detailed explanation here: https://docs.mk.io/docs/endpoints#/
You can create one or several, and there are different types. They can be turned on or off. A single Streaming Endpoint can have hundreds of assets (and live events) assigned to it, but an asset can only be assigned to one Streaming Endpoint at a time (although you can change this whenever you want).
At the time of creating this tutorial, there are three types available:
- Shared: Cost-effective, ideal for lighter workloads, supports up to 200 concurrent users, or simply for content downloads.
- Dedicated: Good performance, scalable to serve up to 10,000 concurrent users without issues.
- CDN: Maximum performance, no limit on concurrent users, and low latency.
For the tutorial, I’ll create a Shared endpoint. Regardless of which type you choose, the way you use it is the same, so you can follow along without any problem.
-
Go to:
https://app.mk.io/project/<your-project-name>/streamingEndpoints -
Click + Create Streaming Endpoint
-
Choose:
- Name: endpointTutorial
- Base URL: tutorial
- Type: Shared .
Click Create and then Start the endpoint.
Heads-up: A running endpoint may generate costs even when idle. See mk.io/pricing for details
Step 7: Assigning the Endpoint to the Asset
-
Open the asset tutorial-streaming
-
-
Under Streaming Endpoint, select it. In my case it is the endpointTutorial and it is running.
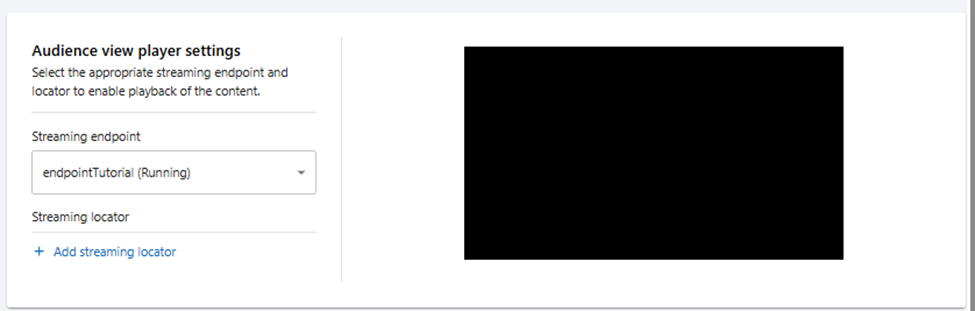
Adding a Streaming Endpoint
Step 8: Creating a Streaming Locator
The Streaming Locator is the last piece we need before our VOD is ready to go live. Think of it as the “ticket” that gives your audience permission to access your content. A Streaming Locator lets you set specific rules for how your asset will be published. For example, you can:
- Choose dates when the content will be available, and when it will stop being accessible.
- Protect it with DRM so that only authorized viewers can watch it.
- Disable streaming but allow the file to be downloaded directly.
There’s a lot more you can do — the full list is in the documentation: https://docs.mk.io/docs/locators#/
For now, the key things to remember are:
- Every asset must have at least one Streaming Locator to be published.
- You can assign more than one Streaming Locator to the same asset, each one generating a unique URL for streaming or downloading.
In the next steps, we’ll create and assign a Streaming Locator so our VOD can be shared with the world.
-
Scroll to the Locators section into the asset window and click + Create Locator
-
Configure:
- Name: locator-tutorial . The locator name must be unique in all your project
- Streaming policy: Predefined_DownloadAndClearStreaming . This policy permits not only to stream the asset but also to provide links to download all the files with progressive downloading. Read more in the tip below.
- Content Key Policy: (empty) . This is used to protect the content
- Expiration time: (empty) . In my tutorial I would not assign expiration date for publication
- Asset filters: (empty) . You can learn more here: https://docs.mk.io/docs/assets#/
- Account filters: (empty) .You can learn more here: https://docs.mk.io/docs/create-an-asset-filter#/
Click Add
Tip: Is streaming a video different from downloading it? Yes — quite a lot.
When you stream a video, the playback happens in real time as the player receives small chunks of media over the internet, using standardized adaptive streaming protocols such as HLS or MPEG-DASH. These protocols split the video into segments and allow the player to adjust quality dynamically depending on the viewer’s network conditions, device capabilities, or other factors.
Downloading the content, often called progressive download, is essentially transferring the entire file to the viewer’s device before or during playback in a linear fashion. While you can start watching before the file is fully downloaded (depending on the player), there is no automatic quality adaptation — you always get the exact file that was requested.
MK.IO lets you define whether an asset can be streamed, downloaded, or both, by selecting the appropriate Streaming Policy when creating your locator.
When click “Add”, you’ll see that the Asset now has a Streaming Endpoint assigned (make sure it’s running) and a Streaming Locator. In the Playback URLs section, two links will appear — one in DASH format and another in HLS format. These are what you’ll need for your audience to watch the content in a web player.
Want to give it a try? Reload the page, and you’ll see the MKPlayer web player right inside the asset, loaded with your content. Hit Play!
Step 9: Playback
Now you’ll see Playback URLs — these are your public HLS and DASH links!
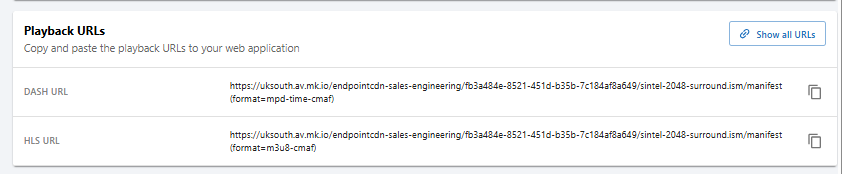
Playback URLs
Click Show all URLs to get all downloadable assets and manifest formats.
Heads-up: When users access these streaming URLs and begin watching content, it may generate bandwidth-related costs. See: mk.io/pricing
You can now preview the content using MKPlayer directly in the asset view.
Example URL Breakdown
https://tutorial.uksouth.streaming.mediakind.com/<locator-id>/<asset-name>.ism/manifest(format=mpd-time-cmaf)- Base URL → from the Streaming Endpoint
- Locator ID → created when you added the locator
- Manifest → either HLS (
m3u8-cmaf) or DASH (mpd-time-cmaf)
What’s Next?
You’ve built your first working on-demand workflow. From here, explore more features:
- Create video transcriptions: Subtitles with WebVTT
- Extract images from the video: Thumbnails
- Add subtitles: Audio Transcriptions
- Build interactive video experiences with our player: Player SDK
You can also use our advanced web player to embed the VOD into your own website — try it from the MKPlayer option under the Deliver menu group, or check the documentation here: https://docs.mk.io/docs/player-sdk#/
Updated 24 days ago