
Run VOD processing jobs
A quick guide to VOD transcoding with MK.IO
Video-on-Demand (VOD) services have revolutionized the way we consume media, offering instant access to a wide array of content. Behind the scenes, transcoding is a pivotal process, converting raw video files into formats suitable for various devices and bandwidths.
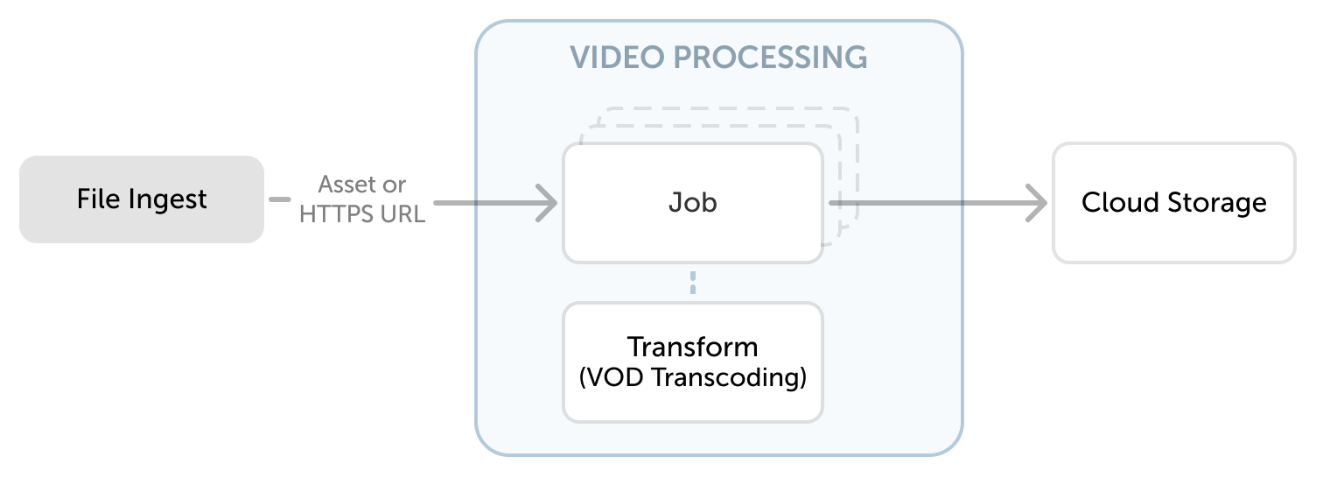
Job with VOD transcoding as transform
MK.IO simplifies this with efficient VOD transcode jobs. Here’s how you can use MK.IO for seamless transcoding of your VOD content.
Create on-demand processing job
Before you start, ensure:
- Your MP4 asset has been successfully migrated from your cloud storage into MK.IO. See creating your first asset for more details.
- You have created a transcription transform that will be applied to the job. See Configure transformations for how-to guide.
-
Log in to MK.IO and select a project.
-
From the left-hand side menu, navigate to Video Processing.
-
From the Jobs tab, start a new transform using the Create Job button.
-
In the drop-down list, select the transform you want to use for this job.
-
Provide a name for your job (required) and write a brief event description (optional).
-
By default, jobs will run in Normal priority. You can adjust this to either High or Low priority. Assigning a high priority to a job will not interrupt any currently running jobs. However, the next time MK.IOpicks a job to run, it will prioritize high-priority jobs. If multiple high-priority jobs are queued, they will be executed in the order they were created.
-
Optionally, you can select a different transform for this job.
-
Configure the input parameters. The job input can be either an asset, or an external URL.
- If your input is an asset, you can:
- Enter the asset name and file name to use as source.
- Click the Select existing asset link to browse the existing assets from the storage accounts in your subscription.
- Click the Upload asset link to create a new asset by uploading files to your cloud storage account. Note: You can also create assets from the Assets page.
- If your input is an an external URL: Enter the full HTTPS URL or SAS URL from which to retrieve the input file. Ensure the URL is accessible via the public internet.
- If your input is an asset, you can:
-
Configure the output parameters:
- Select the storage account in which you want the output asset to be stored.
- Give an asset name for the job output.
-
Click Submit to confirm the creation of the job.
You can also duplicate an existing job and adjust the pre-filled parameters.
Monitor job progression
The job will progress through the following states: queued, scheduled, processing, and finished.
The progress percentage will update as the encode progresses through the workflow. You can monitor the job’s progression on the Video Processing page or by polling the jobs endpoint through the API.
Once the job is finished, your asset will be available on the Assets page where you can add Streaming Locators to make the asset available for playback.
Updated 4 months ago